Concealed wiring ducts have become an integral part of modern home and office design, offering both functionality and aesthetic appeal. This guide will explore the benefits of concealed wiring ducts, provide a step-by-step installation process, and offer tips on maintenance to ensure longevity and safety.
**Introduction**
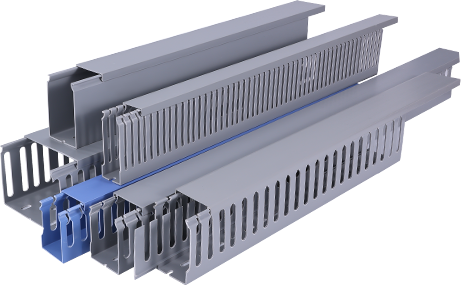
Concealed wiring ducts are designed to house electrical wiring in a way that is not only functional but also aesthetically pleasing. They are used in various settings, from residential homes to commercial buildings, and offer a clean and organized look. In this article, we will delve into the advantages of using concealed wiring ducts, guide you through the installation process, and discuss the importance of regular maintenance.
**Benefits of Concealed Wiring Ducts**
1. **Aesthetic Appeal**: One of the primary reasons for choosing concealed wiring ducts is their ability to enhance the overall aesthetic of a space. By hiding electrical wiring, they create a cleaner and more polished look, which is particularly beneficial in modern and minimalist interior designs.
2. **Safety**: Concealed wiring ducts help prevent electrical hazards by keeping wiring out of reach and away from potential sources of damage. This reduces the risk of tripping over cables and minimizes the chances of accidental damage to the wiring.
3. **Ease of Installation and Modification**: Concealed wiring ducts are designed for easy installation and can be easily modified if the layout of the space changes. This flexibility makes them a practical choice for both new construction and retrofit projects.
4. **Protection from External Elements**: The ducts protect electrical wiring from dust, moisture, and other environmental factors, ensuring that the wiring remains functional and safe for longer periods.
**Installation Process**
1. **Planning**: Before starting the installation, plan the layout of the ducts carefully. Consider the locations of outlets, switches, and other electrical devices to ensure that the ducts are placed strategically.
2. **Cutting and Measuring**: Measure the required length of the ducts and cut them to size. Ensure that the cuts are clean and straight to avoid any damage to the wiring.
3. **Mounting the Ducts**: Attach the ducts to the walls or ceilings using appropriate mounting brackets. Make sure they are securely fastened and properly aligned.
4. **Routing the Wiring**: Feed the electrical wiring through the ducts, ensuring that it is not twisted or kinked. It is essential to leave some extra length at both ends to allow for easy connection to the electrical devices.
5. **Sealing the Ducts**: Once the wiring is in place, seal the ends of the ducts to prevent dust and debris from entering. Use a suitable sealant that is compatible with the material of the ducts.
6. **Testing**: Before finalizing the installation, test the electrical devices to ensure that they are functioning correctly.
**Maintenance**
Regular maintenance of concealed wiring ducts is crucial for ensuring their longevity and safety. Here are some tips:
1. **Check for Signs of Damage**: Periodically inspect the ducts for any signs of damage, such as cracks or wear. If any issues are found, address them promptly to prevent further damage.
2. **Clean the Ducts**: Dust and debris can accumulate in the ducts over time. Use a soft brush or vacuum cleaner to remove any dirt or debris from the inside of the ducts.
3. **Avoid Overloading**: Ensure that the ducts are not overloaded with too much wiring. Overloading can cause the wiring to overheat and increase the risk of a fire.
4. **Professional Inspection**: Have a qualified electrician inspect the ducts and the electrical system regularly to ensure that everything is functioning correctly and safely.
**Conclusion**
Concealed wiring ducts are an excellent choice for anyone looking to enhance the aesthetics and safety of their space. By following the installation process carefully and performing regular maintenance, you can enjoy the benefits of concealed wiring ducts for years to come.
Leave a Reply